2014
20/10/14
This week there are TWO ideas, one fore the slightly older child and one for the little ones. Happy crafting with your kids. A great time for bother care giver and child,
1. Advanced Loom Ideas for the older child.
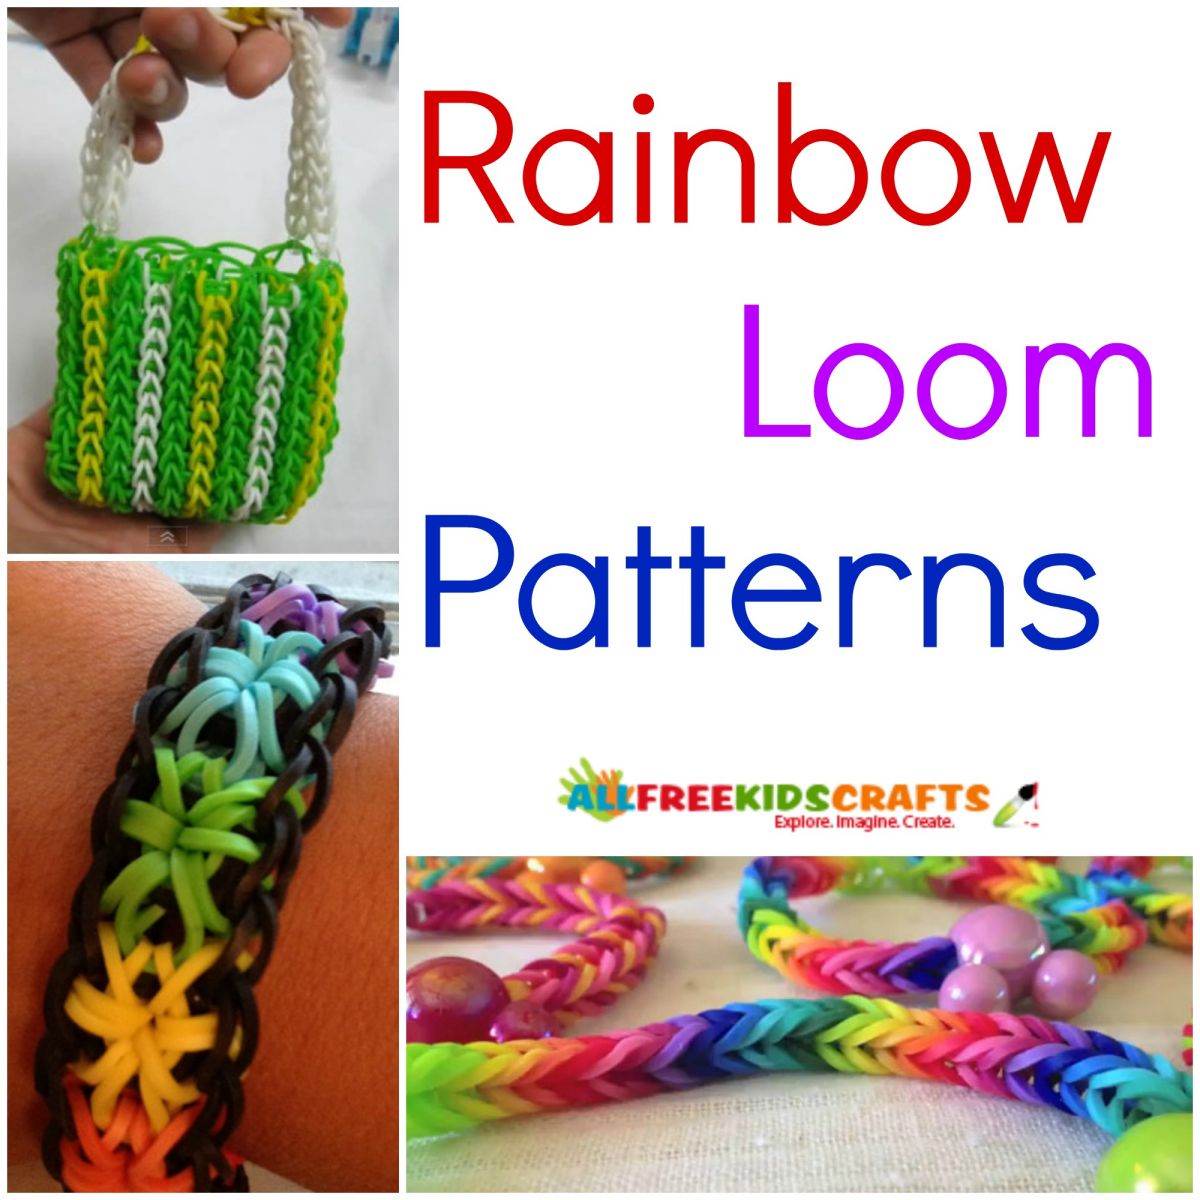 Double Rainbow Loom Pattern
Go to: http://www.allfreekidscrafts.com/Miscellaneous-Crafts-for-Kids/Rainbow-Loom-Patterns/ml/1/?utm_source=pplnewsletter&utm_medium=email&utm_campaign=allfreekidscrafts20141018#5JvdwrrGZtiZmek3.99

2. Adorable Hand print Christmas Trees By: Jill from Meet the Dubiens
Go to: http://www.meetthedubiens.com/2010/12/handprint-christmas-trees.html
13/10/14
This week is an absolute beauty. Everybody has LEGO lying around, just dying to jump into the vacuum cleaner. Well, here at last is a useful idea for everyone this Christmas - LEGO ADVENT CHRISTMAS TREE
You add a piece of LEGO each day in December until you have a full tree by December 25. Awesome idea.

Go to: http://www.willowday.com/2012/12/lego-advent-calender.html for full illustrations and instructions.
6/10/14
An activity for the older 'child' who would like to become involved in craft or want to make something special for themselves or a friend.
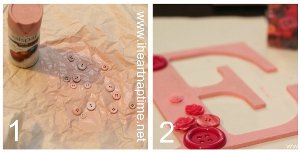
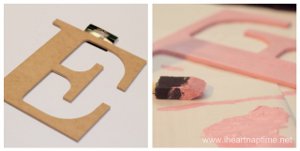
 This Sweet Button
Monogram from Jamielyn Nye is
a great addition to a little girls or boys room. I even like it for my
own room! Made with various novelty craft buttons, this decorative wall
piece is sweet and charming...and so easy to make!
This Sweet Button
Monogram from Jamielyn Nye is
a great addition to a little girls or boys room. I even like it for my
own room! Made with various novelty craft buttons, this decorative wall
piece is sweet and charming...and so easy to make!
29/9/14

23/9/14
Two crafts today - hopefully for two different age groups, depending on what your children like!
1. Melted Crayon Heart Art By: Mama Jodi from Meaningful Mama
Materials: Paper Crafts, Painting & Coloring
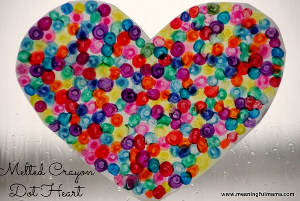 Age Group: Preschool & Kindergarten, Elementary School
http://meaningfulmama.com/2014/01/melted-crayon-dot-heart.html
Age Group: Preschool & Kindergarten, Elementary School
http://meaningfulmama.com/2014/01/melted-crayon-dot-heart.html
16/6/14
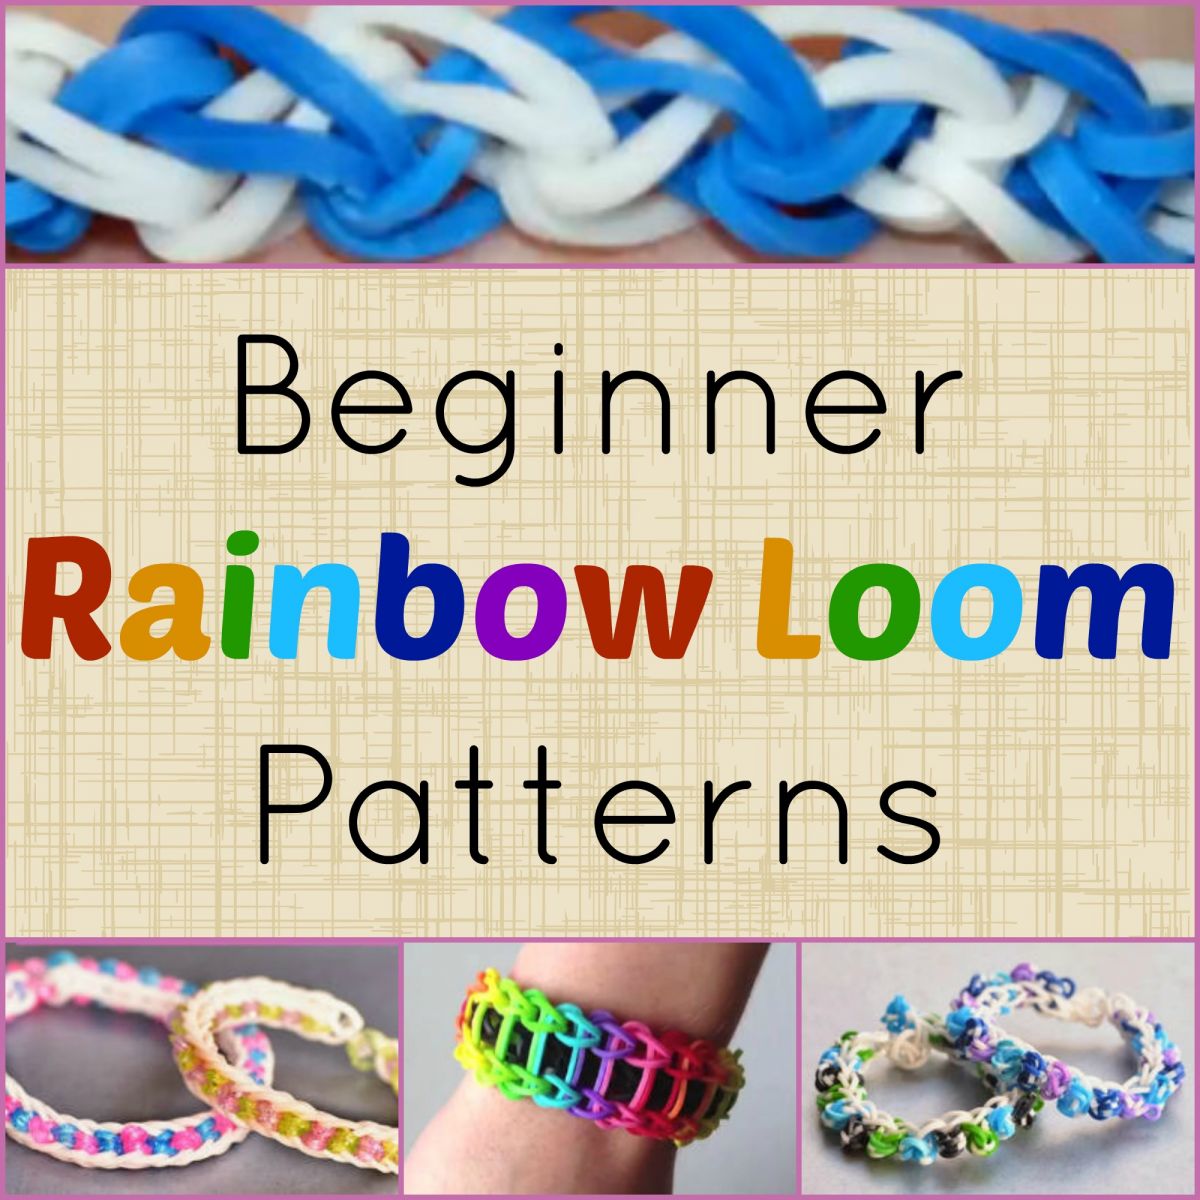
My grand daughters and great nieces are all into craft at present and the most popular is the LOOM BRACELET. I have found a magic site and shall be reading it very carefully s that I can help my girls.
http://www.allfreekidscrafts.com/Kids-Jewelry-Making/Beginner-Rainbow-Loom-Patterns
 8/6/14
What you’ll need:
 4. Center each stick, they should be crossing each other like an intersection and should stick out enough for a bird to perch on.
5. Next, holding the lower part of the feeder below the sticks, you’ll spread a light layer of peanut butter on the upper part of the toilet paper roll and cover in bird seed. We used the back of a spoon to slather on the peanut butter and pressed in the bird seed all around it. Careful not to cover your holes at the top, you’ll clog them with peanut butter and you need them for the next step!
1/6/14

When dry, use a toothpick to dot black onto the whites of the eyes.
Use scissors to cut around the ladybug, leaving a felt border.
Attach a magnet to the back with white craft glue.
12/5/14
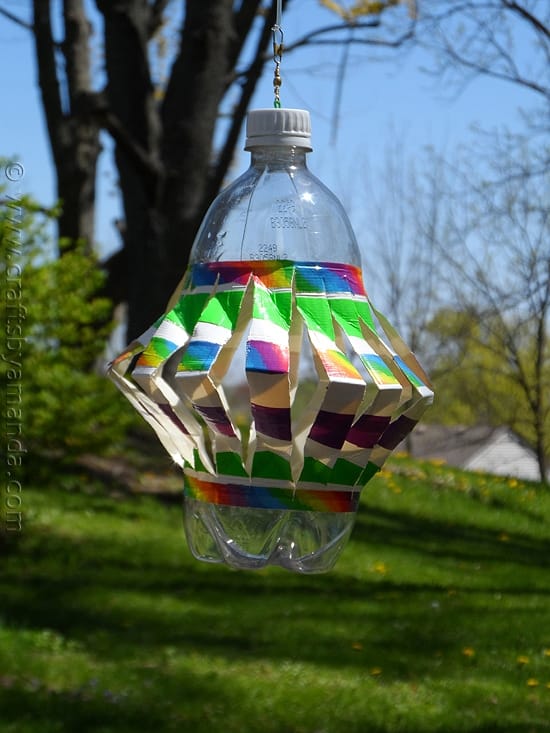
Recycled Plastic Bottle Wind Spinner
Everybody
has a plastic bottle lying around around. Here is a great activity for
children.


Who doesn't love a simple holiday craft?
http://eastcoastmommyblog.blogspot.ca/2012/04/toilet-roll-bunnies.html

Dying Easter Eggs Naturally


 I let their idea grow as
I thought about other foods that would have similar characteristics and the
ability to impart colour on eggs. Tea and wine came to mind– if they can stain
teeth and lips, why not eggs too? You might wonder why I didn’t start with
grape juice, rather than wine. Well I had wine that was more than a few days
old and I didn’t have any grape juice on hand, it’s as simple as that.
I let their idea grow as
I thought about other foods that would have similar characteristics and the
ability to impart colour on eggs. Tea and wine came to mind– if they can stain
teeth and lips, why not eggs too? You might wonder why I didn’t start with
grape juice, rather than wine. Well I had wine that was more than a few days
old and I didn’t have any grape juice on hand, it’s as simple as that.
16/3/14
Pony beads are great for children to start with. Any leftovers, you can use for so many items, I will try and find more for you to see next week.
- See more at: http://www.makingfriends.com/ponybead/pony_owl.htm#sthash.BPA2X9pS.dpuf
9/3/14
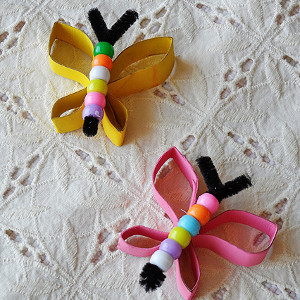
Pipe Cleaner Butterflies: By:

2/3/14
Paper Plate Aquarium


24/2/14
LIGHT SABERS
Make yourself the most popular mum amongst their friends. We all need to know how to make light sabers.
 1 piece of poster board
Then we slid the rolled up poster board down into our paper towel roll:
We used packing tape to close the edge of this off. My 7 year old would have preferred glue of some sort so that it looked better, but this did work well. So take your pick, do it either way. Tape this closed:
Then my 7 year old decorated the hilt (or paper towel roll) with the duck tape. He rolled the silver on first:
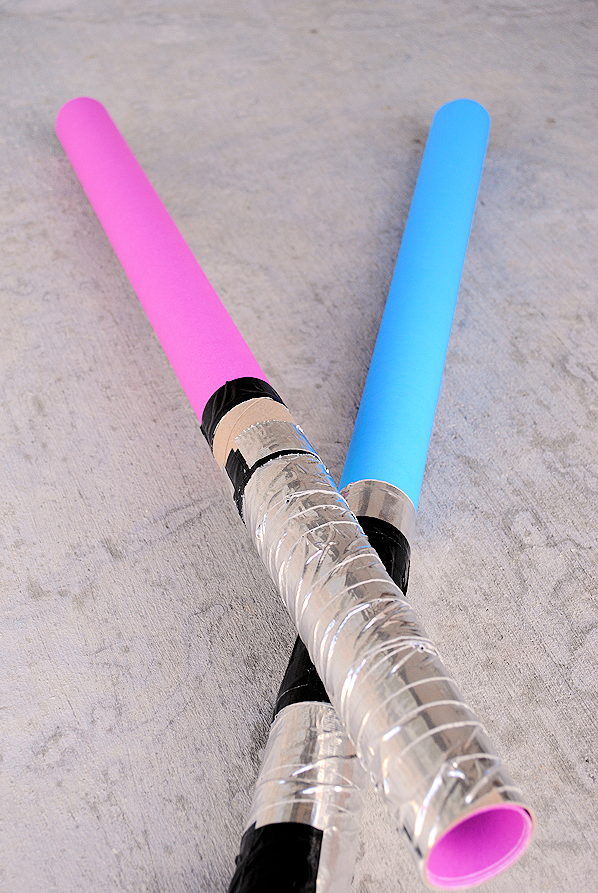 To do a double bladed one for Darth Maul just do the same thing but cut the poster board in half first, roll it and and stick one in each end.
16/2/14
This week there are TWO ideas, one fore the slightly older child and one for the little ones. Happy crafting with your kids. A great time for bother care giver and child,
1. Advanced Loom Ideas for the older child.
Start at the beginning with
Rainbow Loom Patterns and then
Double Rainbow Loom PatternStarburst Rainbow Loom Pattern
Rainbow Loom Ring Tutorial
Mini Handbag Rainbow Loom Pattern
Go to: http://www.allfreekidscrafts.com/Miscellaneous-Crafts-for-Kids/Rainbow-Loom-Patterns/ml/1/?utm_source=pplnewsletter&utm_medium=email&utm_campaign=allfreekidscrafts20141018#5JvdwrrGZtiZmek3.99
2. Adorable Hand print Christmas Trees By: Jill from Meet the Dubiens
Go to: http://www.meetthedubiens.com/2010/12/handprint-christmas-trees.html
13/10/14
This week is an absolute beauty. Everybody has LEGO lying around, just dying to jump into the vacuum cleaner. Well, here at last is a useful idea for everyone this Christmas - LEGO ADVENT CHRISTMAS TREE
You add a piece of LEGO each day in December until you have a full tree by December 25. Awesome idea.
Go to: http://www.willowday.com/2012/12/lego-advent-calender.html for full illustrations and instructions.
6/10/14
An activity for the older 'child' who would like to become involved in craft or want to make something special for themselves or a friend.
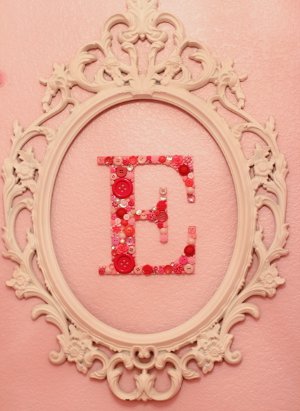
Sweet Button Monogram -By: Jamielyn Nye for I Heart Nap Time
This Sweet Button
Monogram from Jamielyn Nye is
a great addition to a little girls or boys room. I even like it for my
own room! Made with various novelty craft buttons, this decorative wall
piece is sweet and charming...and so easy to make!
Materials:
- Wooden Letter
- Paint
- Buttons
- Embellishments
Instructions:
- This button letter was so easy to make. All you
need to get started is a plain wooden letter. You can find these at any
craft store. Then you’ll paint it to match your color scheme. I’ve seen
some cute multi-colored button letters as well. There so many different
variations you could do. Great creative!
- Gather several different buttons in all shapes
and sizes. I spray painted several buttons to make them pink.
Arrange your buttons on your letter before gluing.

- Once you’ve laid all your buttons down you can start gluing. Start with your bigger buttons first.
- Once all your buttons are glued on, you can fill in the empty spaces with rhinestones and brads.
29/9/14
Easy activity this week.
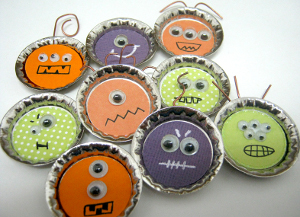
Spooky Bottle Cap Monsters
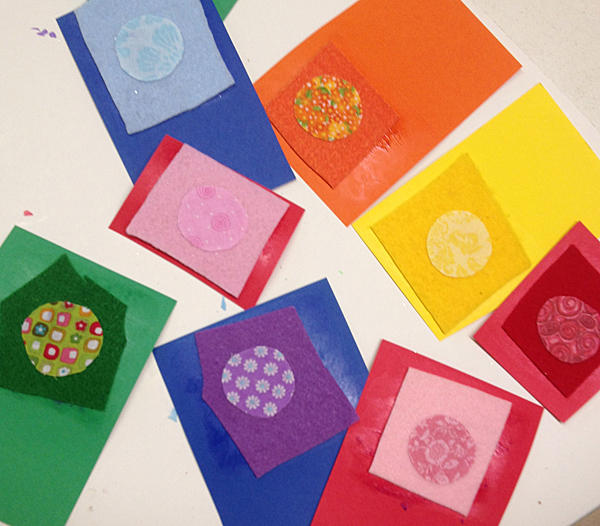
You may scream with delight when you see these adorable Spooky Bottle Cap Monsters! Made using only a few simple materials, these mini monsters are great for embellishing other Halloween projects or turning into magnets for your fridge. This is a great project for kids and something fun and easy to do during a blistery afternoon. With Halloween quickly approaching, this is one fun last-minute craft idea that's sure to please little hands and big ones alike!
Spooky Bottle Cap Monsters
This image courtesy of Einat Kessler
Primary Technique: Paper Crafts
Occasion/Theme: Fall
Materials:
- Bottle caps
- Purple, green & orange cardstock
- 1” circle punch
- Metal wire
- Two sizes of toy eyes
- Black pen
Instructions:
- Punch 1” circles from cardstock.
- Create monster faces with combination of different size eyes. Add different shaped mouths with black pen.
- Create hair from metal wire: Cut pieces from metal wire and glue to the back of the bottle cap with tape. Cover with a 1” circle. Shape the metal wire to create curls, straight or crazy shapes.
- Use the bottle caps as party favors, napkin holders, decoration or embellishments for scrapbook layouts and cards.
Read more at
Two crafts today - hopefully for two different age groups, depending on what your children like!
1. Melted Crayon Heart Art By: Mama Jodi from Meaningful Mama
Materials: Paper Crafts, Painting & Coloring
Age Group: Preschool & Kindergarten, Elementary School
For Full instructions
2. Rainbow Wrapped Headband By: Lion Brand Yarn
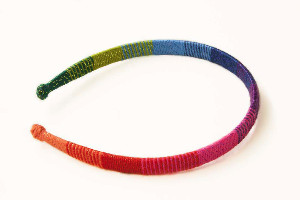 The ombre look just got a colourful upgrade with this Rainbow Wrapped Headband. Kids can easily update their style with this simple tutorial.
More for the older child.
For Full instructions see the site below.
http://www.allfreekidscrafts.com/Kids-Costumes-and-Clothes/Rainbow-Wrapped-Headband-from-Lion-Brand/ml/1/utm_source=pplnewsletter&utm_medium=email&utm_campaign=allfreekidscrafts20140816#ZKGcbIDyBhKtD3Hd.99
14/9/14
17/8/14
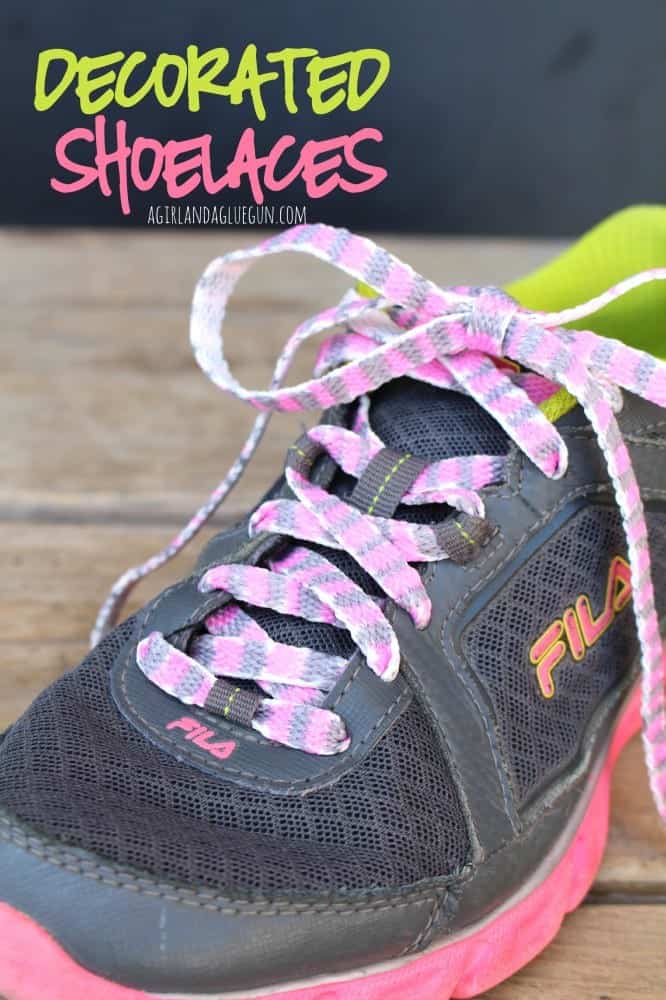
personalized decorated
shoelaces

 \
\
For these lovely clips go to: http://club.chicacircle.com/homemade-holiday-hairpins-gift-idea-holiday-craft-lightning/
I hope you enjoy your crafting time with your children.
4/8/14
Another busy week for the little people in our lives. I have found an assortment of great activities for the kids, both genders I hope.
Dreamy Lace Dream
Catcher
 If you're having trouble sleeping, which happens to
everyone, catch your troubles in the Dreamy Lace Dream Catcher. The addition of lace makes this dream
catcher way more dreamy. Personalize your sleep aid to make your pillow time
extra productive. Monsters and bad dreams all get caught and only the sweetest
dreams make it into your head. Since this kids' craft only takes 10 minutes,
you can whip up a dream catcher any time you're having trouble getting shut eye.
If you're having trouble sleeping, which happens to
everyone, catch your troubles in the Dreamy Lace Dream Catcher. The addition of lace makes this dream
catcher way more dreamy. Personalize your sleep aid to make your pillow time
extra productive. Monsters and bad dreams all get caught and only the sweetest
dreams make it into your head. Since this kids' craft only takes 10 minutes,
you can whip up a dream catcher any time you're having trouble getting shut eye.
http://www.craftingconnections.net/the-blog/dreamcatchers-a-10-minute-project/#.U92No_mSwnATime
to complete: Under 30
minutes
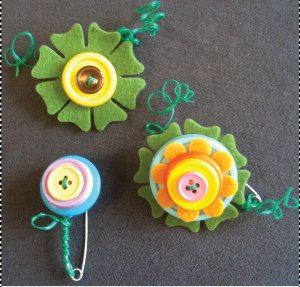
No-Sew Felt Bow
 Make your hair bow-utiful by popping in an adorable accessory. The
No-Sew Felt Bow is so easy to make that you'll want to make one in every color.
Learn how to make hair bows the simple way with absolutely no sewing necessary,
and in no time you'll be giving them out as gifts. These fun hair adornments
feminize any outfit, and they work for any age from toddler to teen. Bring out
your inner girly girl and twirl with a bow in your hair.
Make your hair bow-utiful by popping in an adorable accessory. The
No-Sew Felt Bow is so easy to make that you'll want to make one in every color.
Learn how to make hair bows the simple way with absolutely no sewing necessary,
and in no time you'll be giving them out as gifts. These fun hair adornments
feminize any outfit, and they work for any age from toddler to teen. Bring out
your inner girly girl and twirl with a bow in your hair.
Cute Caterpillar
Clothespin Ornaments
 Materials: Mixed Media/Miscellaneous
27/7/14
My grandchildren love GLOW STIX. So this week I have found a pattern for GLOW BALLS that they can make. Give it ago , may save a lot of money over the years. I am sending you to the original site for this and you will find many other patterns for GLOWING Activities.
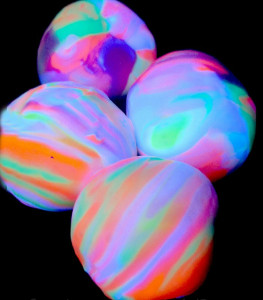 " Making glowing RAINBOW Bounce Balls is a simple activity, and my girls had a lot of fun testing them out on varying surfaces. To make Glowing RAINBOW Bounce Balls you will need to first make 6 separate balls, one in each colour of the rainbow."
http://www.growingajeweledrose.com/2013/05/play-recipes-homemade-bounce-balls.html
20/7/14
This really works for me with my love of yarn and love of craft for kids. This was brought by http://blog.lionbrand.com/2012/08/10/4-ways-yarncrafting-can-help-kids-heading-back-to-school/
 This time of year it’s easy to get caught up in the excitement and anxiety of starting a new school year. Recently it’s become popular to introduce teens and children to yarncrafts as they head back to school; it’s been seen that crafting has numerous benefits that can help all ages during times of stress. Plus, taking a little time to relax can be helpful for kids and adults, particularly when you take some time to enjoy a hobby you love together.
13/7/14
Spring Birds Recycled CD By: Amanda Formaro for AllFreeKidsCrafts.com
I quite love these and I often have old CD's lying around. I have hung them in the fig tree to frightn off the birfd, but ddoen't work that well. So this is a much better idea.

6/7/14
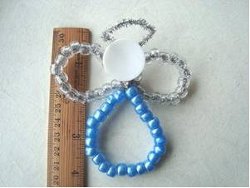
Little Beaded Angel By: Emi Harrington for FaveCrafts
29/6/14
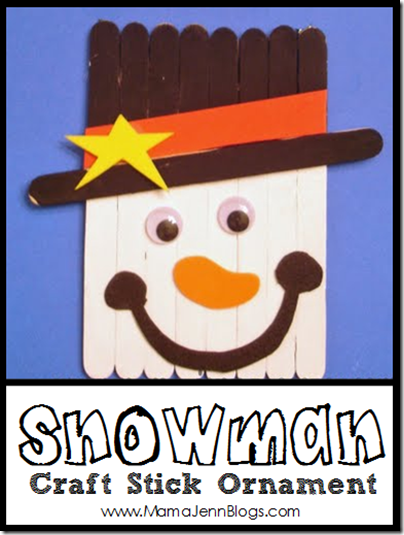
Courtesy of MammaJen at http://mamajenn.com/blog/2009/12/snowman-banner-craft-craft-stick-style.html this is a great craft that can be made and be kept to a reasonable cost.
Have Fun!
Snowman Banner Craft {Craft Stick Style}
 2) Once dry, flip it over and use a pencil and the one extra craft stick to mark one line where the brim of the hat will go. (This will be the line that separates the white paint from the black paint.)
 4) While your little one is paining, use the foam to cut out the following:
 5) Help your little one glue everything on…and there you have it, your very own imitation Oriental Trading snowman banner craft!
23/6/14
2. Rainbow Wrapped Headband By: Lion Brand Yarn
The ombre look just got a colourful upgrade with this Rainbow Wrapped Headband. Kids can easily update their style with this simple tutorial. More for the older child.
For Full instructions see the site below.
http://www.allfreekidscrafts.com/Kids-Costumes-and-Clothes/Rainbow-Wrapped-Headband-from-Lion-Brand/ml/1/utm_source=pplnewsletter&utm_medium=email&utm_campaign=allfreekidscrafts20140816#ZKGcbIDyBhKtD3Hd.99
14/9/14
7 Beginner Rainbow Loom Patterns + Video Tutorials
By: Emily Timmons, Editor, AllFreeKidsCrafts.com
Go to http://www.allfreekidscrafts.com/Kids-Jewelry-Making/Beginner-Rainbow-Loom-Patterns#X0p8Bl1qj6Z4So3C.99
17/8/14
Two great crafts for the children and you this week, i hope you enjoy.
personalized decorated
shoelaces
Holiday Hairpins By: Pauline from Club Chica Circle
Little ones can put a festive twist on DIY hair accessories by making these Holiday Hairpins. Can be made for themselves of for present for a friend. Would make a great Christmas present for all the girl friends this year.
\For these lovely clips go to: http://club.chicacircle.com/homemade-holiday-hairpins-gift-idea-holiday-craft-lightning/
I hope you enjoy your crafting time with your children.
4/8/14
Another busy week for the little people in our lives. I have found an assortment of great activities for the kids, both genders I hope.
Dreamy Lace Dream
Catcher
If you're having trouble sleeping, which happens to
everyone, catch your troubles in the Dreamy Lace Dream Catcher. The addition of lace makes this dream
catcher way more dreamy. Personalize your sleep aid to make your pillow time
extra productive. Monsters and bad dreams all get caught and only the sweetest
dreams make it into your head. Since this kids' craft only takes 10 minutes,
you can whip up a dream catcher any time you're having trouble getting shut eye.
http://www.craftingconnections.net/the-blog/dreamcatchers-a-10-minute-project/#.U92No_mSwnATime
to complete: Under 30
minutes
Dreamy Lace Dream Catcher
Materials: Fabric Crafts,
Beads & Jewelry, Mixed Media/Miscellaneous
Age Group: Preschool & Kindergarten,
Elementary School, Pre-Teens
Time to complete: Under 30 minutes
No-Sew Felt Bow
Make your hair bow-utiful by popping in an adorable accessory. The
No-Sew Felt Bow is so easy to make that you'll want to make one in every color.
Learn how to make hair bows the simple way with absolutely no sewing necessary,
and in no time you'll be giving them out as gifts. These fun hair adornments
feminize any outfit, and they work for any age from toddler to teen. Bring out
your inner girly girl and twirl with a bow in your hair.
Materials: Fabric Crafts
Age Group: Elementary School, Pre-Teens, Teens
Time to complete: Under 30 minutes
Cute Caterpillar
Clothespin Ornaments
Cute Caterpillar Clothespin Ornaments are the perfect Christmas
ornaments for kids to make. They are simple, yet adorable, and they're sure to
brighten up your tree. The tutorial also shows how to make lovely little
birdies, which are chirp, er, cheap. This wonderful craft will keep money in
your hands and happiness in the air. Show everyone how cute those "creepy
crawlers" can be.
 Materials: Mixed Media/Miscellaneous
Age Group: Preschool & Kindergarten, Elementary School
Time to complete: Under 30 minutes
Cute Caterpillar Clothespin Ornaments
This image
courtesy of sillyeaglebooks.com
http://www.sillyeaglebooks.com/2009/12/how-to-make-book-inspired-clothespin.html
27/7/14
My grandchildren love GLOW STIX. So this week I have found a pattern for GLOW BALLS that they can make. Give it ago , may save a lot of money over the years. I am sending you to the original site for this and you will find many other patterns for GLOWING Activities.
Glow-in-the-Dark Bouncy Ball By: Crystal from Growing a Jeweled Rose
" Making glowing RAINBOW Bounce Balls is a simple activity, and my girls had a lot of fun testing them out on varying surfaces. To make Glowing RAINBOW Bounce Balls you will need to first make 6 separate balls, one in each colour of the rainbow." http://www.growingajeweledrose.com/2013/05/play-recipes-homemade-bounce-balls.html
20/7/14
This really works for me with my love of yarn and love of craft for kids. This was brought by http://blog.lionbrand.com/2012/08/10/4-ways-yarncrafting-can-help-kids-heading-back-to-school/
4 Ways Yarncrafting Can Help Kids Heading Back to School
This time of year it’s easy to get caught up in the excitement and anxiety of starting a new school year. Recently it’s become popular to introduce teens and children to yarncrafts as they head back to school; it’s been seen that crafting has numerous benefits that can help all ages during times of stress. Plus, taking a little time to relax can be helpful for kids and adults, particularly when you take some time to enjoy a hobby you love together.Here are some great ways that yarncrafting can help the kids, teens and grown-ups in your life:
Crafting is something you can do by yourself to relax. Knitting or crocheting a few rows between classes or on the morning bus can lend a sense of value to these hurry-up-and-wait portions of the day. It’s a great way to decompress at the end of a long day, and can help clear your mind as you work.
Yarn-crafting can help you connect with other people.Lots of activities for young people seem to be designed to be done alone; but crafting, particularly yarncrafting, can be a great way to spend a little face-time with friends or family. Lots of schools are developing crafting clubs, and crafting with a group of peers can introduce students to new friends.
Working with yarn is a hobby that gives you a sense of accomplishment. Often students have trouble sensing the worth of their accomplishments and the very real value of practice and learning from your mistakes. Knitting and crochet are great hobbies that demonstrate the value of trying and sticking-to-it in a comfortable, low-pressure way. Plus, there’s the added benefit of wearing your successful finished projects!
Working with yarn is a hobby that gives you a sense of accomplishment. Often students have trouble sensing the worth of their accomplishments and the very real value of practice and learning from your mistakes. Knitting and crochet are great hobbies that demonstrate the value of trying and sticking-to-it in a comfortable, low-pressure way. Plus, there’s the added benefit of wearing your successful finished projects!
Handmade crafts can help young children learn to focus and develop their motor abilities. When you watch a child do something that they really love, it’s clear: they are focused, confident, and enjoying themselves. Some schools have found that introducing boys and girls to knitting and crochet has greatly improved their concentration and ability to focus. Often kids who tend to be tactile learners or need to develop fine motor control benefit a great deal from having a physical outlet for their creativity.
Want to see more kids crafting in your neighbourhood?
Consider volunteering to help start a crafts club. Some schools and community centers have started after school clubs focused on needles arts, providing a place for kids to relax and get to know one another as they work. Donating yarn, needles, hooks, or your time to kids is a wonderful way to help them get started crafting! Want to teach a group of kids to knit or crochet? Here are our tips to help you get started: 7 Tips for Teaching Kids How to Knit or Crochet
Related Links:
- Crafting with Kids Before School
- 4 Back to School Teacher Gifts to Craft, Knit and Crochet
- Start Them Early with Children’s Books Featuring Yarncrafts
- 5 Crafts With Kids, No Knitting or Crochet Required!
13/7/14
Spring Birds Recycled CD By: Amanda Formaro for AllFreeKidsCrafts.com
I quite love these and I often have old CD's lying around. I have hung them in the fig tree to frightn off the birfd, but ddoen't work that well. So this is a much better idea.
Materials:
- CD or DVD
- Scrapbook paper
- Orange card stock or construction paper
- Large googly eye
- Feathers
- Glue stick
- Scissors
- Pen or pencil
- White craft glue
Instructions:
- Trace CD onto scrapbook paper.
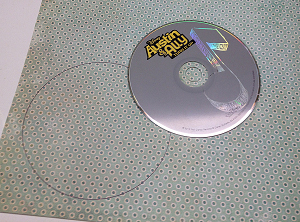
- Cut the circle out of the scrapbook paper and cover the back with glue stick.
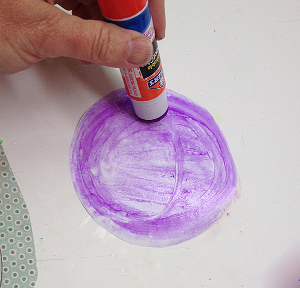
- Press the sticky side of the circle to the CD.
- Cut a small triangle from orange paper and glue to the front of the CD, sticking out over the edge.
- Glue a feather to the top of the CD. Glue a feather to the right side (back) of the CD for the tail and another to the front (center) of the CD for the wing.
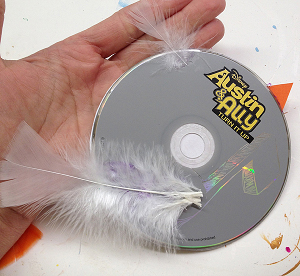
- Add googly eye with white craft glue.
6/7/14
Little Beaded Angel By: Emi Harrington for FaveCrafts
Another one for Christmas in July.
Should be relatively easy for most children and they will be able to make plenty ready for the Christmas tree or as gifts for their friends as a Christmas gift ready for December. (As it comes around very quickly)
Materials:
- 58 pony beads (34 for the wings, and 24 for the body).
- 2 pipe cleaners
- 1 shank button or 1 large bead for the head.
Video: https://www.youtube.com/watch?v=FSVy0_8hZyo
Instructions:
- On one pipe cleaner, thread 34 beads, (this will be for the wings). On the other pipe cleaner, thread 24 beads, (this will be for the body).
- Form the wings. Bring the two ends of the pipe cleaner together, and twist to close. Pinch to find the center of the string of beads, (or count to find the center), and bring the center to the twisted end. Twist to form a figure “8”.
- Make the body. Twist the two ends of the pipe cleaner together, leaving one long end.
- Connect the wings and the body. Using the ends of the pipe cleaner from the wings section, wrap around under the head, and twist together at the back.
- Make the head: Pass a shank button, or a large bead on the long end of the pipe cleaner, then form a halo with the remaining pipe cleaner.
29/6/14
Courtesy of MammaJen at http://mamajenn.com/blog/2009/12/snowman-banner-craft-craft-stick-style.html this is a great craft that can be made and be kept to a reasonable cost.
Have Fun!
Snowman Banner Craft {Craft Stick Style}
Supplies Needed:
- 9 regular sized craft sticks
- paint (black & white)
 craft foam (orange, red, black, and yellow)
- cardboard
- glue

Directions:
1) Line up eight of the craft sticks and cut the cardboard so that you can glue it onto the sticks. Glue the cardboard onto the sticks (to hold them together) and let the dry.
 2) Once dry, flip it over and use a pencil and the one extra craft stick to mark one line where the brim of the hat will go. (This will be the line that separates the white paint from the black paint.)
3) Let you little one paint the craft sticks (the top black and the bottom white). Paint the extra one black.
 4) While your little one is paining, use the foam to cut out the following:
- nose (orange foam)
- “ribbon” for the hat (red foam)
- star (yellow foam)
- mouth (black foam)
5) Help your little one glue everything on…and there you have it, your very own imitation Oriental Trading snowman banner craft!
You can even add a string to it so that you can hang it up! This makes a cute Christmas tree ornament or simply a winter decoration to hang on a doorknob! -
See more at: http://mamajenn.com/blog/2009/12/snowman-banner-craft-craft-stick-style.html#sthash.OTRRiAVo.dpuf
23/6/14
A darling children;s activity for this week. Colourful, and should be reasonably easy to assemble.
Enjoy.
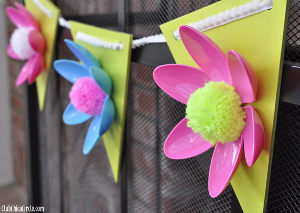 Pretty Plastic Spoon Flower Garland By: Pauline from Club Chica Circle
http://club.chicacircle.com/easy-plastic-spoon-spring-flower-garland/
for full instructions and pictures of each stage.
16/6/14
My grand daughters and great nieces are all into craft at present and the most popular is the LOOM BRACELET. I have found a magic site and shall be reading it very carefully s that I can help my girls.
http://www.allfreekidscrafts.com/Kids-Jewelry-Making/Beginner-Rainbow-Loom-Patterns
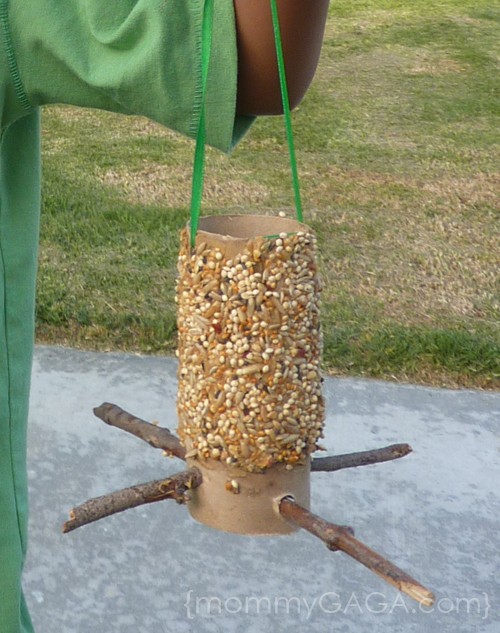
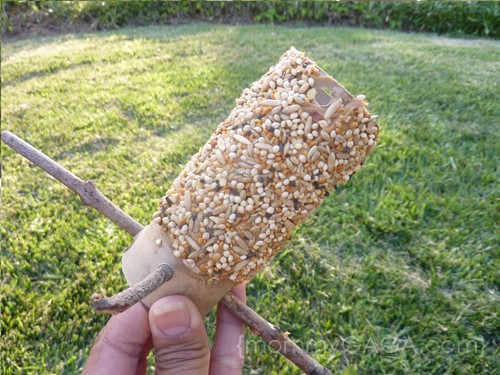
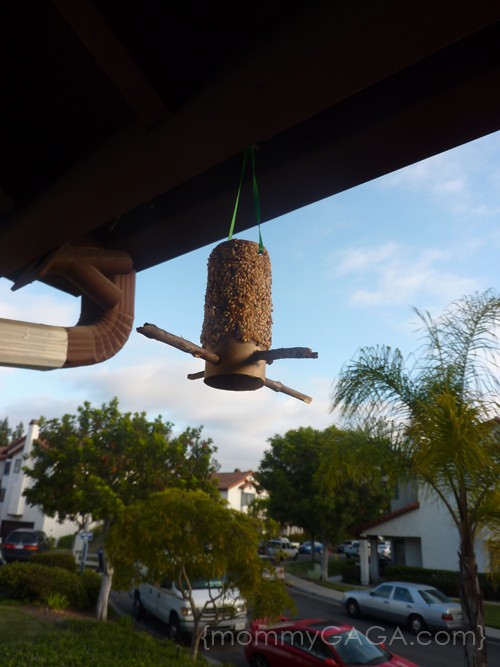
Toilet Paper Roll Bird Feeder By: Deanna from Mommy Gaga
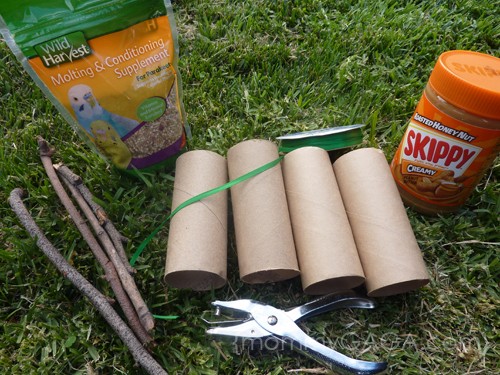
What you’ll need:
- Toilet Paper Rolls
- Sturdy sticks, 2 per roll, 6-8 inches long
- Bird seed
- Peanut Butter
- String or ribbon
- A Hole Punch
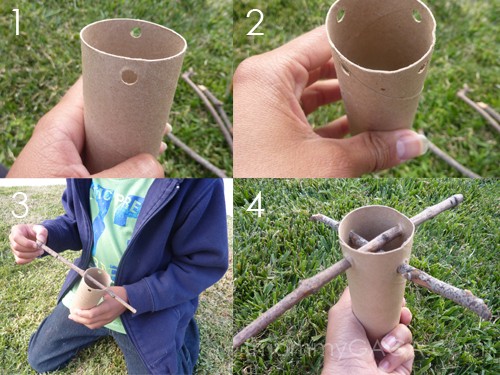
1. Punch 2 holes in one side of the toilet paper roll, aligning them evenly across from each other. This will be used to tie the string for hanging.
2. Punch 4 holes into the opposite end of the toilet paper roll, align them evenly. This is for the sticks that the birds will perch on. Try to put one set a little higher than the other so the sticks can be pushed through without issue.
3. Insert the 2 sticks into each hole, going in one side and out the other in the corresponding hole. Wiggle and push in sticks gently, you don’t want the holes to rip or get too loose. The sticks might fall out!
4. Center each stick, they should be crossing each other like an intersection and should stick out enough for a bird to perch on.5. Next, holding the lower part of the feeder below the sticks, you’ll spread a light layer of peanut butter on the upper part of the toilet paper roll and cover in bird seed. We used the back of a spoon to slather on the peanut butter and pressed in the bird seed all around it. Careful not to cover your holes at the top, you’ll clog them with peanut butter and you need them for the next step!
6. Cut string to your desired length. Tie your string to the top of the bird feeder through the two holes you cut in step 1 to make it hangable. Now you are ready to hang your homemade bird feeder and admire!
http://www.mommygaga.com/2012/06/how-to-make-a-bird-feeder-fun-summer-crafts-for-kids.html
This is the first week of winter so activities become more of indoor hobbies, craft & reading for our young people to participate in so they do not become BORED!
Toilet Paper Roll Garden By: Leslie from Pink Stripey Socks
This image courtesy of http://www.pinkstripeysocks.com/2014/03/toilet-paper-roll-flowers-and-cacti.html
Materials: Recycled Crafts, Painting & Coloring
Age Group: Toddlers, Preschool & Kindergarten, Elementary School
Time to complete: In an evening
Read
more at http://www.allfreekidscrafts.com/Recycled-Kids-Crafts/Toilet-Paper-Roll-Garden#To7jePyTs1eOI8RU.99
25/5/14
This week is a relatively easy but can be achieved by both boys and girls. All my grand children like jewellery making and it is sometimes difficult to find something that the boys can wear. I hope they all enjoy making this necklace for their best friends and themselves. I haven't copied the pattern as I could not do it justice. The best idea is to go to the link below and visit the site itself as there are great pictures describing each step.
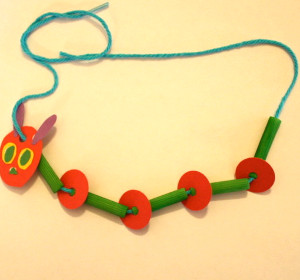
BFF Puzzle Necklace
BFF Puzzle Necklace are adorable jewellery making ideas for kids! Pick out puzzle pieces and make these necklaces for you and your little ones. The best part? If you have more than one best friend, you can make multiple connecting pieces!
This image courtesy of speckless.wordpress.com
Project Type: Make a ProjectBead Type: PaperTime to complete: Under an hourBead Technique Used: StrungBead Project Type: Necklace
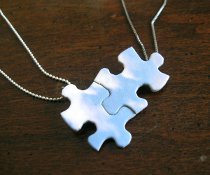
Difficulty Level: Beginner
Read more at http://www.allfreejewelrymaking.com/Jewelry-for-Kids/BFF-Puzzle-Necklace#Op6BAivgLjIPr64a.99
19/5/14
Here is a great idea to help mum get rid of scraps of material which she may just have lying around in her sewing basket.
Materials:
- Fabric scraps
- Round plastic lid
- Felt to coordinate with your fabric
- Card stock
- Black and white craft paint
- Round magnets
- Scissors
- Pen
- Paintbrush
- Toothpick
- Glue stick
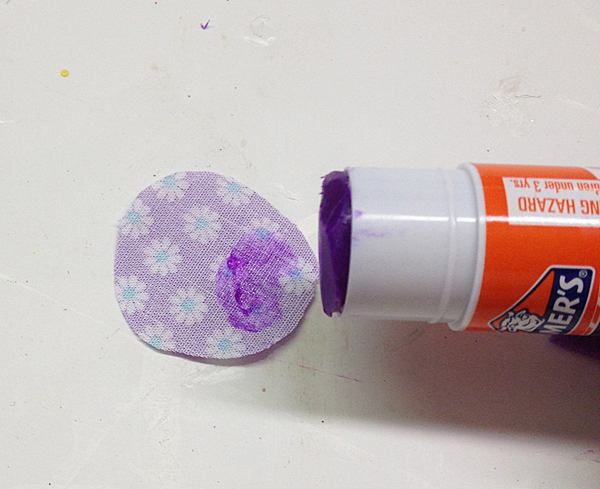
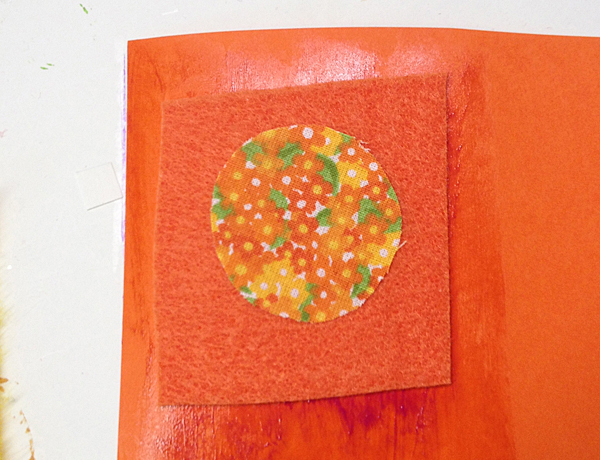
Instructions:
- Trace around the round plastic lid onto the fabric. Use scissors to cut out the circle.
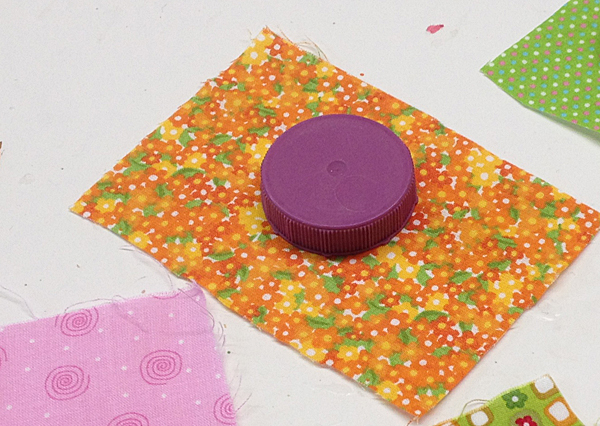
Cover the back of the fabric circle with a glue stick.
Stick the fabric circle to coordinating felt. Glue the felt to the card stock.
Paint a semi-circle for the head with black paint.
Use the handle end of the paintbrush to dot on the whites of the eyes. Let everything dry completely.
 |
Read more athttp://www.allfreekidscrafts.com/Kids-Decorative-Crafts/Scrappy-Ladybug-Magnets/ml/1/?utm_source=ppl-newsletter&utm_medium=email&utm_campaign=allfreekidscrafts20140516#dAW5umwdKOjzuQjX.99
12/5/14
Recycled Plastic Bottle Wind Spinner
Everybody
has a plastic bottle lying around around. Here is a great activity for
children.
Go to: http://craftsbyamanda.com/2013/06/recycled-plastic-bottle-wind-spinner.html for full instructions
4/5/14
clothes pin butterfly
Go to the link below for the easy to follow instructions.
http://indietutes.blogspot.com.au/2009/04/clothes-pin-butterfly.html
13/4/14
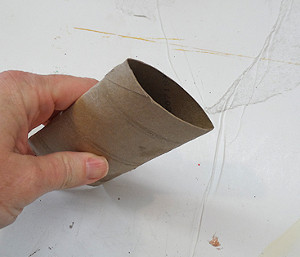
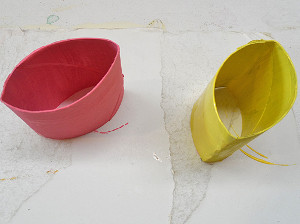
 Toilet Roll Bunnies

The week before Easter and school holidays in many places. This is a craft that many little ones will enjoy making using up those cylinders from paper towel, plastic wrap etc. Get out the craft box and the cotton wool and see what exciting little rabbits the children make.

1) Paint the toilet rolls white and allow to dry completely.
2) Cut ears and feet from cardstock (see shapes below). You can also color the insides of the ears pink.
3) Use white glue to add eyes and a nose. Then, use a black marker to draw a mouth and whiskers. (You could also draw in paws and bow tie. Let the kids be creative.)
4) Use white glue to secure the ears and the feet.


Who doesn't love a simple holiday craft?
http://eastcoastmommyblog.blogspot.ca/2012/04/toilet-roll-bunnies.html
30/3/14
Still on our Easter theme for the children we are this week decorating eggs in readiness for the special weekend in April.Due to copyright I couldn't download many details so it is best if you go to the site and follow from there. I think it is well worth the effort.
Bunny and Carrot Easter Eggs
The site is: http://www.itsoverflowing.com/2012/03/bunny-and-carrot-easter-eggs/
23/3/14
This week I am preparing for Easter. It is now only a dew weeks away and the children would have seen the hot cross buns (in store at New Year) and the wonderful selection of Easter eggs (sorry grandchildren, grandma isn't quite that generous) available this year. So don't despair crafters, but I am taking you to all things Easter with the children till the weekend arrives.
Dying Easter Eggs Naturally
Dying Easter Eggs is a
fun family tradition. I can remember standing on a chair trying to reach the
counter top in my grandmother’s kitchen where she had the eggs lined up and
ready to dye & decorate. The tradition continues in my house, we generally
use food colouring or the Paas colouring kits for our eggs. This time around I wanted to try something different. I was intrigued by something I read on the
site Serious Eats — how to dye eggs with items you’d find in your kitchen:
turmeric, beets and red cabbage were their choices. Check out the way I Decorate Easter Eggs :: Dying Easter Eggs Naturally…
Tea: Make a few cups of
very strong tea (at least 4-5 tea bags in 2-3 cups of water). Add a splash of
vinegar too. Let the eggs sit overnight.
Red wine: Fill a cup 1/2
way with wine. Gently lower one or two eggs in at a time. Let soak for an hour
or even overnight until you like the shade you’ve created.
I let their idea grow as
I thought about other foods that would have similar characteristics and the
ability to impart color on eggs. Tea and wine came to mind– if they can stain
teeth and lips, why not eggs too? You might wonder why I didn’t start with
grape juice, rather than wine. Well I had wine that was more than a few days
old and I didn’t have any grape juice on hand, it’s as simple as that.
This process is so
simple that it barely needs to be mentioned; with very little effort you can
explore a new color palette for your dyed eggs. The tea produces a deep bronze colour and the red wine imparts a lovely shade of lavender.
This process is so
simple that it barely needs to be mentioned; with very little effort you can
explore a new colour palette for your dyed eggs. The tea produces a deep bronze colour and the red wine imparts a lovely shade of lavender.
Tea: Make a few cups of
very strong tea (at least 4-5 tea bags in 2-3 cups of water). Add a splash of
vinegar too. Let the eggs sit overnight.
Red wine: Fill a cup 1/2
way with wine. Gently lower one or two eggs in at a time. Let soak for an hour
or even overnight until you like the shade you’ve created.
I let their idea grow as
I thought about other foods that would have similar characteristics and the
ability to impart colour on eggs. Tea and wine came to mind– if they can stain
teeth and lips, why not eggs too? You might wonder why I didn’t start with
grape juice, rather than wine. Well I had wine that was more than a few days
old and I didn’t have any grape juice on hand, it’s as simple as that.
This process is so
simple that it barely needs to be mentioned; with very little effort you can
explore a new colour palette for your dyed eggs. The tea produces a deep bronze color and the red wine imparts a lovely shade of lavender.
16/3/14
Pony beads are great for children to start with. Any leftovers, you can use for so many items, I will try and find more for you to see next week.
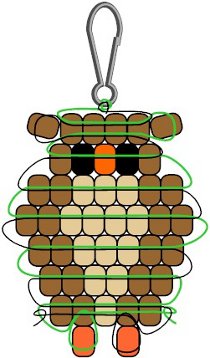
Owl Pony Bead Pattern
You need:
--28 Brown Pony Beads
--3 Orange Pony Bead
--2 Black Pony Beads
--13 Tan Pony Beads
--4 Feet Satin Cord
--1 Lanyard Hook
Instructions:
Fold your cord in half to find the center. Use a half hitch (see detail below) to secure it to lanyard hook. Lace beads using pattern at right as a guide. Finish by tying off with a double knot.
9/3/14
Pipe Cleaner Butterflies: By:
Get the kids involved with this butterfly craft fromEmi Harrington.
Use inexpensive pipe cleaners and beads to create many variations of butterfly,
each on unique. Once you learn how to make butterflies, you can branch out to
dragonflies too!
For one butterfly:
Materials:
- 3 Glitter Pipe
cleaners
- 5 pony beads
- 2 larger beads or
buttons
Video: Go to website below and follow by video if you wish
Instructions:
- Make the body: Fold a
pipe cleaner in half. Fold up the folded end up a bit so the beads won’t
pass through.
- Place 5 pony beads on
through both ends of the pipe cleaner.
- Place the larger bead,
or button on to form the head. Push all the beads to the bottom (folded
end) of the pipe cleaners.
- Form the 2 ends of the
pipe cleaner into spirals to form the antennae.
- Make the wings: Form
one pipe cleaner into a circle. Twist the ends together, but leave 1 inch
at the end for attaching it to the body of the insect. Then twist the
circle together in the center to for a figure “8”. Do that with the
remaining pipe cleaner as well.
- Attach to the body, between
the head and the next bead, by twisting the 1 inch protruding ends of the
pipe cleaners around the body of the insect. Reshape the wings and
antennae.
2/3/14
Paper Plate Aquarium
For this paper plate aquarium you will need:
2 light blue paper plates (or plain plates painted light blue)
Colored paper
Googly eyes
Handful of Kix cereal (In Australia, use a cereal that is similar)
Colored paper
Googly eyes
Handful of Kix cereal (In Australia, use a cereal that is similar)
Colorful tri-beads
Glue
Glue Kix cereal to the bottom of the blue side of the first plate.
Cut fish and plants from colorful paper and glue to the plate. Add googly eyes to the fish. Glue tri-beads to the cereal. Cut the center out of the second paper plate and glue it to the front of the aquarium.
Now you’re ready for a little aquatic fun!
24/2/14
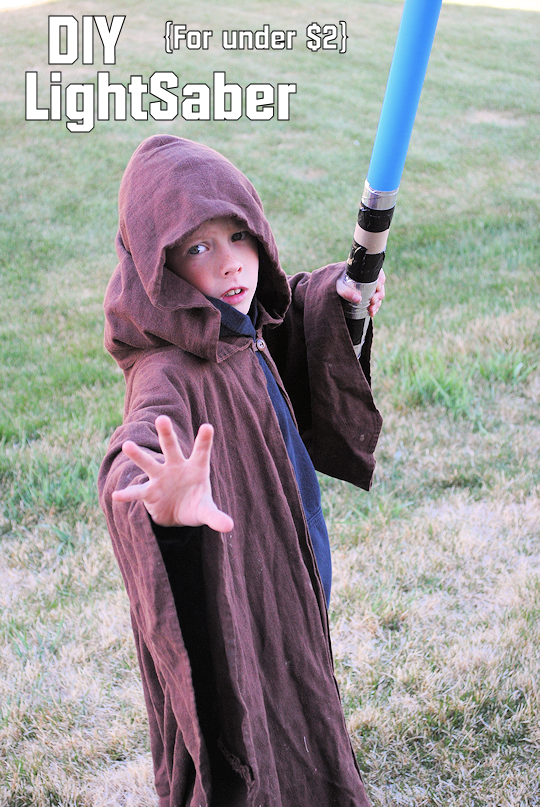
LIGHT SABERS
Make yourself the most popular mum amongst their friends. We all need to know how to make light sabers.
DIY LightSabers Tutorial:
Supplies Needed:
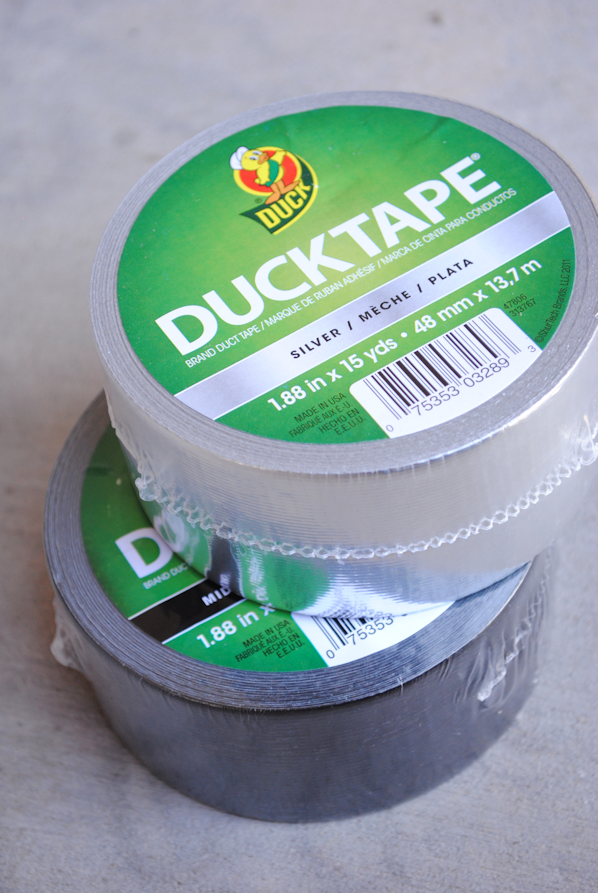
Duck Tape (we used silver and black that we got at Hobby Lobby)
Paper Towel Roll
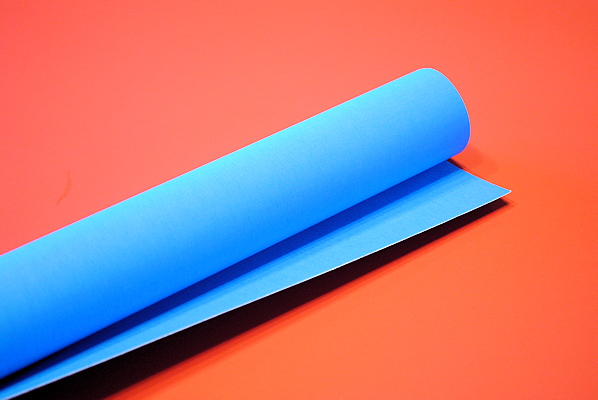
1 piece of poster board
Clear packing tape or heavy duty glue
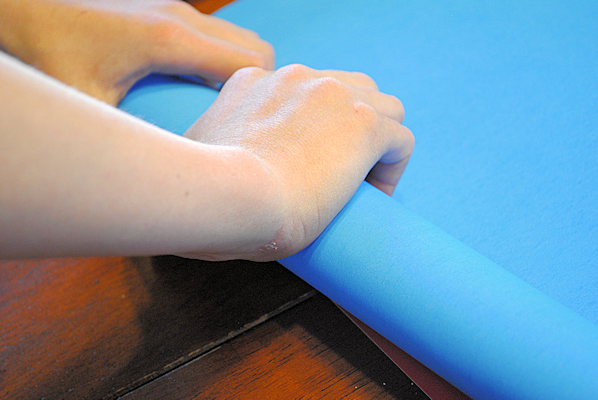
Instructions:
We started off by rolling our post board vertically (so that it ends up long).
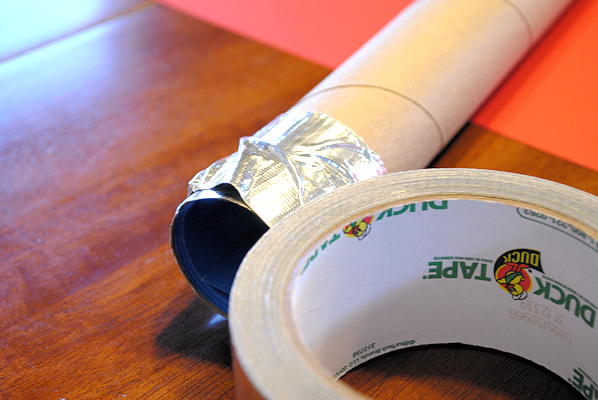
Then we slid the rolled up poster board down into our paper towel roll:
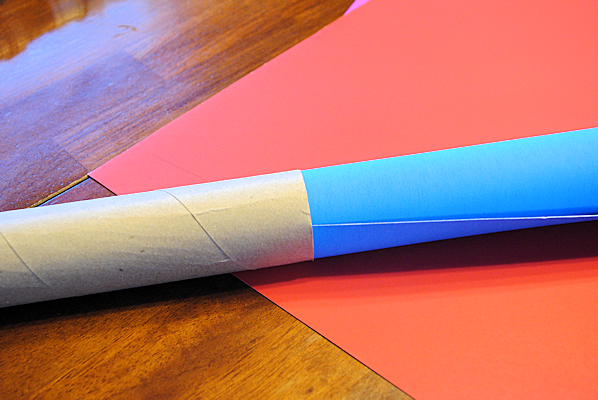
We used packing tape to close the edge of this off. My 7 year old would have preferred glue of some sort so that it looked better, but this did work well. So take your pick, do it either way. Tape this closed:
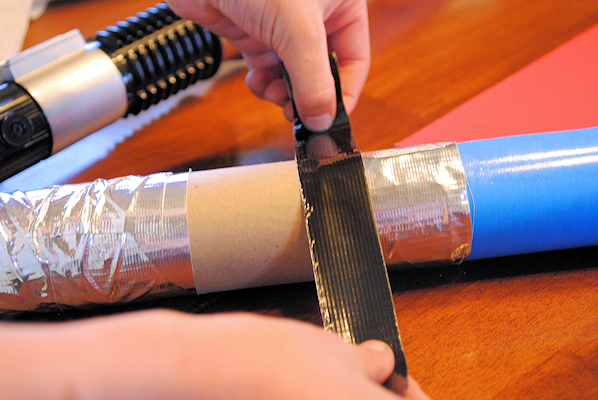
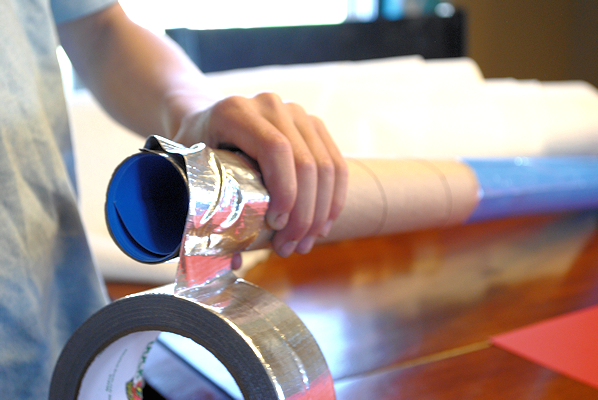
Then my 7 year old decorated the hilt (or paper towel roll) with the duck tape. He rolled the silver on first:
To do a double bladed one for Darth Maul just do the same thing but cut the poster board in half first, roll it and and stick one in each end.
And that’s it. Each one only took us about 5 minutes. And they are sturdier than you would imagine. Tons of fun!
Have fun making these with your kids and please share them with anyone you think would be interested. My 7 year old’s so excited to share these with the world!
And, spread the word about Crazy Little Kid’s Projects. We want to see lots of submissions!
http://crazylittleprojects.com/2013/05/diy-lightsaber-tutorial-kids-project.html
16/2/14
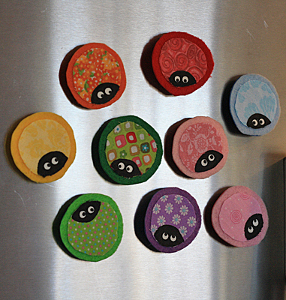
Ladybug Lids By:
 Please go to the following web site for great instructions. http://craftsbyamanda.com/2010/04/plastic-lid-ladybugs.htm
9/2/14
Hand print Sunflower

What you’ll need:
yellow paint
green paint
paintbrushes
green craft foam
scissors
glue
black beads
canvas or paper
green paint
paintbrushes
green craft foam
scissors
glue
black beads
canvas or paper
Directions:
1. paint your child’s palm yellow and have
them stamp it 4 times in a circle at the top of your canvas
2. paint a green stem
3. cut 2 leaves out of your green craft foam and glue them to the stem
4. when the yellow paint is dry, put some glue in the middle of the sunflower
in a circular shape and sprinkle with black beads
5. allow to dry and display your beautiful masterpiece
http://www.meetthedubiens.com/2011/06/handprint-sunflower.html
5/2/14 Introduce your children to this beautiful majestic creature with symmetry art. When out in the garden watch these creatures in flight, catch one and watch the life cycle.
Go to the web site and follow the two sets of instructions. Older and younger children are all catered for.
http://buggyandbuddy.com/monarch-butterfly-symmetry-art-for-kids/
27/1/14
Make a Kite with a FedEx Mailing Envelope

Learn how to make an awesome kite using mailing envelopes. This tutorial is from David Erik Nelson's "SNIP, BURN, SOLDER, SHRED: Seriously Geeky Stuff to Make with Your Kids" (No Starch Press, 2010).
Step 1

Begin by preparing the kite’s sail. Trim off the self-adhesive flap from the first envelope. Cut the folded seam along one 13" edge and the 10" edge. Lay the envelope flat to create a roughly 20" by 13" rectangle (see image).
Step 2

Lay out the envelopes as shown in the image. If you want your kite to advertise the fine services of FedEx, UPS, or United Postal Service Priority Mail, then position the envelopes with the corporate logos facing up. If you prefer a white kite, turn the plain sides up. You can decorate your kite using permanent markers. Because Tyvek takes ink really well but packing tape does not, this is the time to decorate the kite if you are going to draw a design.
Step 3

Use strips of packing tape to join the rectangles into one large sheet, and then set aside the large sheet.
Trim one of the two bamboo stakes to 33" (leave the other at its full 4' length).
Cross the two stakes, or spars, as shown in the image, so that the short cross bar is centered and 15" from the tip of the long spar, and then tie a snippet of string around this intersection. (This is optional, but it makes it easier to maneuver the spars; the string keeps them more-or-less aligned for the next step.)
Step 4

Lay out the large Tyvek sheet so that the packing tape is facing away from you and the extra bit of Tyvek is in the upper-right corner and jutting off to the right. Place the spars on top of the sheet, as shown in the image above.
Use long strips of packing tape to attach the frame directly to the sail; be sure to leave 2" at the end of each spar untaped.
Use long strips of packing tape to attach the frame directly to the sail; be sure to leave 2" at the end of each spar untaped.
Step 5

To reinforce the edge, tie the string to the end of any spar, and then run the string to the next adjacent spar, looping it several times around the spar and overlapping the string on itself (as shown in the image). Run the string from spar to spar until you are back at the start. These lines should be taut without deforming the kite (which should be a symmetrical diamond); you can adjust them for maximum tension and symmetry. The combination of the almost untearable Tyvek sail, the flexible bamboo frame, and the fluid reinforcement of the string will cause the wind to bend the kite into something similar to an Eddy bow kite—a remarkably stable and easy-to-launch design. Eddy bows are the gold standard in simple recreational kites. This kite has the advantages of the Eddy bow without your having to invest a lot of time in tailoring a neatly curved sail.
Step 6

Use long strips of tape to secure the string around the edges of the sail. A taut sail will spill air evenly off its edges and will be more stable in flight, so be sure to keep the sail as taut as possible. (Realize that you are taping envelopes to string; it’s not going to be taut as a drum head.) Leave a 1/2" section of the bottom of the long spar clear of tape.
After the string is taped down, cut away the excess sail, leaving a 1/2" margin around the entire diamond, as shown in the image. (This margin might be a little rough, but don’t sweat it.)
After the string is taped down, cut away the excess sail, leaving a 1/2" margin around the entire diamond, as shown in the image. (This margin might be a little rough, but don’t sweat it.)
Step 7

Snip off the margin at each vertex of the diamond sail (seen in the image) to create four flaps along the edges (similar to the envelope flaps you removed in Step 1) that you can fold over the string along the kite’s edges.
Fold each flap over the string, creasing it as close as possible to the string reinforcement. (You can run the side of a marker down these creases to make them nice and sharp.) Tape the flaps down.
Now you’ll add the bridle. Flip the kite over so that the exposed spars are underneath, measure 10" from the top and the bottom of the long spar, and mark these points on the face of the kite.
Use the tip of the utility knife, scissors, or a nail to poke holes through the sail on either side of the long spar.
Step 8
Cut a 44" length of string for the bridle. (I don’t advise using kite string; heavier string will hold up better, especially if you’re omitting the 1/2" split ring.) Feed one end through the top set of holes, tie it to the spar, and then feed the other end to the bottom set of holes and tie it to the spar.
(Optional) You can add the bridle ring now (see “Adding the Bridle Ring” on page 289 of "Snip, Burn, Solder, Shred") or wait until your first kite-flying excursion.
(Optional) You can add the bridle ring now (see “Adding the Bridle Ring” on page 289 of "Snip, Burn, Solder, Shred") or wait until your first kite-flying excursion.
Step 9

Now for the tail, which adds stability by dragging down the bottom of the kite and shifting the center of the kite’s weight toward the bottom of the diamond. (Think of a canoe, which is most stable when the weight is close to the bottom; stand up, and the boat gets very shaky.) A 9' caution tape tail might be overkill, but it looks pretty, even in a crash (especially if you get caught in a bad crosswind and start looping). You can trim it down or add to it at your discretion. To connect the tail, make a 1 1/2" cut into one end of the strip of caution tape. Then tie it around the open section at the bottom of the long spar, as shown in the image above. (If you don’t have caution tape, you can tie together a few narrow newspaper bags or even use strips cut from a garbage bag. Since this plastic is so lightweight, you’ll need to use a full 9' or more to stabilize your kite, depending on conditions. You can maximize the length of such a bag tail — and thus the drag it exerts — by splitting the bags along both long edges before tying them together.)
20/1/14
Recycled Sleeve Placemat Weave By:
12/1/14
 This week is a craft I am practising to use with a 6 and 7 year old, the kids should love it. Suitable for both boys and girls. Enjoy the holidays.
http://www.michaelannmade.com/2011/07/woven-friendship-bracelet-tutorial.html
6/1/2014
The first craft for this year is a Valentines day type craft for the littlies. It is from CLASSIFIED MOM whoworked on this with her 20 month old son. You can easily up this to preschool by having them cut out their own hearts!
Go to: http://www.classifiedmom.com/2012/01/valentines-day-kids-craft-i-heart.html for other great ideas.

What you need:
·
Black, White and Orange Construction Paper
·
Pencil
·
Scissors
·
Glue
Prep: You will need to cut out (or trace and have your
preschooler cut out): one large black heart and one white (about 1/2"
smaller) for the penguins body. One medium black heart and one white (about
1/2" smaller) for the penguins head. Two long, skinny black hearts for the
penguins wings. Three small orange hearts for the penguins beak and feet. And
two small black hearts for the penguins eyes.
·
Optional: crayonsWhat to do:
1. Have your child glue the corresponding white hearts to the black hearts to create its face and body. Glue the penguin's head to the body.
2. Glue the two long, skinny hearts to either side of the body.
3. Glue on the two orange hearts to make the feet.
4. Arrange the two small black hearts (eyes) and the small orange heart on the penguin's face and glue into place.
5. Optional: Draw in details.
Cute books about penguins:
I hope this gets your year of craft and activity with your children off to a good start.
 I hope this page will list some great crafts and activities for children.
16/12/2013
1. Playful Polar Bear Masks
 Made from a paper plates (what wonderful art materials these make!)
2. Popsicle Stick Pom Pom Christmas Trees
By: Whitney from It's Gravy, Baby!
You can buy coloured sticks and all other requirements usually from your local news agent.
 http://itsgravybaby.com/2011/12/christmas-tree-craft/
 3. Home-made Christmas Ornaments for Kids with Pipe Cleaners
and Wooden Beads
3. Home-made Christmas Ornaments for Kids with Pipe Cleaners
and Wooden BeadsI feel you could also use plastic pony beads too.
Enjoy!
8/12/2013
The crafts this week are probably more aimed at the slightly older child, depending on how much assistance is available. The web sites are quite descriptive though and I think these crafts will be enjoyed.
The first craft is using empty toilet rolls due to hygiene reasons then please use any other cylinders you may have, (paper towel, plastic wrap ) Go to website for directions.

http://www.michelemademe.com/2010/11/series-3-situation-christmas-ornament_26.html
The second craft is decorating Oreo biscuits and making Snowmen from them.
 Dipped Oreo Snowmen
I hope everyone has fun with these two activities.

This week I am directing you straight to the website as they can do it much better than I can. Good luck with your craft this week.
http://www.allfreechristmascrafts.com/More-DIY-Christmas-Decorations
If you're looking for Christmas garden flags and you just aren't finding what you're looking for, try making your own instead. This Thrifty Snowman Garden Flag is an inexpensive craft that will add a wintry feel to your front yard, if it doesn't feel like winter already. Be prepared to use an abundance of one of the most popular craft supplies for Christmas, glitter. Your flag craft will sparkle and shine when you display it proudly this season.
- Poinsettia Burlap Wreath
- Large Peppermint Candy Decor
- Gorgeous Glitter Reindeer Frame
- Crochet Snowflake Garland
- Giant Ornaments Outdoor Decoration
25/11/2013
This week is just a fun week! It is not Christmas related unless they wish to make these for their siblings or friends. It is Spoon Puppets. Here they can use whatever you have available and their imagination which is always a great thing.
Spoon Puppets.
You'll Need:
·
plastic
spoons, soup and dessert is nice to make adults and children
·
permanent
markers, red and black, medium to fine tip
·
yarn,
felt, paper, mini pom poms
·
double
stick tape or all purpose craft glue to adhere yarn, felt and paper
How To:
Kids that are old enough to draw faces can do this project on
their own, though you might want to get the ball rolling by doing some examples
yourself. You can also look at my spoon puppet post from last year for
inspiration. Have fun, and a tutorial to make a cute stage is coming early next
week. All the best!
21/11/2013
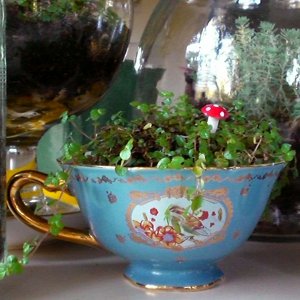
Found this terrarium this morning in amongst the children's crafts and I love it not just as a child's activity but also for the adults.
Might be one for the holidays for everyone.
You could search the second hand shops for some of the over-large cups that were frequent a few years back and make a larger terrarium that just the normal tea cup.
Tiny Teacup Terrarium (double click above to take you to the instructions)
By: Lori Marie from Pretty Little Things
18/11/2013
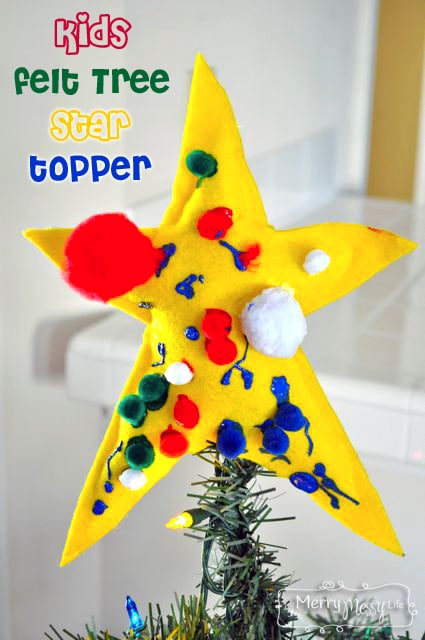
Felt Star Tree Topper
http://mymerrymessylife.com/2012/12/christmas-craft-with-kids-felt-star-tree-topper.html
Materials: Mixed Media/Miscellaneous, Painting & Coloring
Age Group: Toddlers, Preschool & Kindergarten, Elementary School
Supplies
- 2 Sheets of yellow felt from the craft store (only 23 cents at Wal-Mart for the brand “Eco-Fi” – and they’re made from recycled plastic bottles!)
- Assorted tubes of Puffy Paint (these were under $1 each and I bought 5)
- Sharp fabric scissors
- Fabric chalk pencils - one light and one dark, or a couple of pieces of chalk
- Bag of pom-poms
- Hot glue gun or permanent fabric glue (to glue the two pieces together)
- Polyester fiber fill or stuff it with old plastic bags, chop up an old t-shirt and socks – use your imagination! (to stuff the star)
Directions
- Trace a star onto one sheet of yellow felt with your chalk pencil, or pin the two sheets together and then cut out. I freehanded-it by folding the sheet in half and drawing half of the star onto the felt. Then I cut it out so it would be perfectly symmetrical.
- Have your child decorate both stars with pom-poms and puffy paint. Gabe discovered that the paint acts as a glue and adheres the pom-poms to the felt, so no fabric glue is necessary.
- Wait about 24 hours for it to dry.
- Hot glue the two pieces together but only along the edges, leaving about one inch on either side of the bottom of the star as a pocket to slip over the top of the tree.
- Stuff the star with your choice of stuffing then slide over the top branch of the tree!
11th November, 2013

Hand print Christmas Tree. A great activity for all children but particularly the younger age groups. Made with paint and decorations including buttons, whatever you have in you homes.
What you’ll need:
paper
green and brown paint
paint brush
star made out of sticker craft foam
glue
decorations – bingo dabbers, buttons, glitter
green and brown paint
paint brush
star made out of sticker craft foam
glue
decorations – bingo dabbers, buttons, glitter
Directions:
1. paint your child’s palm green and stamp on the paper pyramid style – 3 on bottom, 2 in middle and 1 on top
2. paint on a brown trunk
3. stick star on top
4. decorate your tree with whatever you want – we used bingo dabbers, buttons and glitter2. paint on a brown trunk
3. stick star on top
3rd November, 2013
Christmas Kids
Craft: Model Magic Gingerbread Wreath

Supplies:
Paper Plate, Scissors, Glue, Cookie Cutters, Hole Punch, Fine Glitter &
Ribbon

Tip: Use a plastic place mat or wax paper to roll out your
MM.
Cut
out your "gingerbread" shapes, ice them with glue and dust them with
liberal amounts of fine glitter.
Cut
out center of paper plate by folding plate in half and cutting along embossed
line.
Assemble
your "cookies" onto the paper plate and glue down.
I glued ours down while they were still slightly pliable. Doing so allowed the
pieces to mold to the slightly concave edge of the paper plate.
Add
a ribbon to hang.
I don't know if you can tell, we had a broken foot on the
lower right gingerbread man. Watch out that you don't roll your MM to thin. The
good news is, the MM glues together beautifully.
28th October, 2013
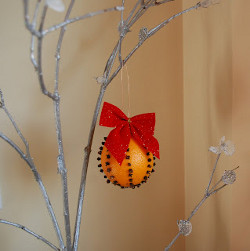
Bow-utiful Christmas Orange Pomander
Materials Required

Make sure you use a navel orange and not a Mandarin, the skin is just to loose to hold in the cloves.
Most books say just to push in the cloves directly but I find the kids will struggle with that. It's much easier for them to poke the orange with a toothpick first and then insert the clove.
 We are just doing a simple line design but you can cover the orange completely if you want, or write your name with cloves, or even a shape like a poinsettia flower.

The kids really enjoy this activity and it will make your house smell wonderful.

For the hanger take a length of wire about 10 inches or so.

Break a toothpick in half.

Wrap the wire around the toothpick and twist together to form a loop.
Punch a few holes in the top of your orange close together to form a large enough opening for the hanger.

Insert hanger into the hole and push down with a pencil or paintbrush handle.
Pull up a little on the hanger and it should stay in place.
The toothpick swells up a bit and holds the hanger in place.

Add a bow and you have a very nice Christmas decoration. If you only use a few cloves in your design your orange will probably not last forever.
If you completely cover your orange with cloves your pomander will last longer and may dry out completely.

This is a lovely craft. I made several many years ago, and we only bring them out in December and arrange in a bowl on the dining table. They still smell fantastic. The only difference being I covered the oranges in cloves and rolled the clove studded oranges in a mixture of orris root and cinnamon, then storing them in tissue and a brown paper bag, in a dark place for a couple of months. Naturally children cannot wait that long so this craft today doesn't require waiting and is therefore quite suitable.
20th October, 2013
Beaded Dream Catcher
This is another craft I want to make with my girls. It is a beauty, could easily be made for a little boy, particularly if they are having bad dreams.

Supplies: Paper Plate, Scissors, Paint, Yarn, Feathers, Beads, Hole Punch
Optional: Stickers or Markers

Cut hole using plate indent as guide. Punch holes around inside edge. Paint.

While plate is drying, tie yarn to feather. Make several knots to act as a stopper for the beads. You will need 3 feather strings. Tip: roll a piece of tape around top of yarn, like an aglet on a shoelace. This helps young kids slide the beads on.

This took awhile because we had to sort through the beads for the perfect beads. Our paint was dry by the time we were done. You may need to wait longer or overnight. Also, the thicker the paint you use the longer it takes to dry.

Randomly string your yarn through the holes. Add a few beads for extra decoration as you go. My 4 year old needed help with this step. Decorate with stickers if you want.
Punch three holes at what will be the bottom of the Dream Catcher. Tie feathers to bottom of Dream Catcher. Hang on wall or from bed post. If your child does have a bad dream have child blow the bad dream into the Dream Catcher.
Found on the website below, http://4crazykings.blogspot.com.au/2010/03/kids-craft-dream-catcher.html
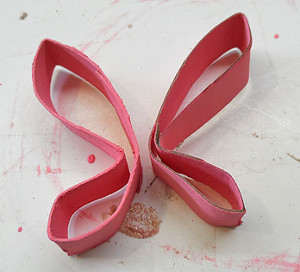
13th October, 2013
Absolutely beautiful little butterflies that are so easily made (Providing no-one stabs another with the fork. If concerned you can use a plastic fork provided it has four prongs). I am making some this afternoon so I will be confident when I make them tomorrow with my great niece. Attach them to cards, present, barettes, hair clips or ties. Probably great for any age group but certainly excellent for the 6 - 10 year old. The site below is wonderful.
http://www.homemadeatmyplace.blogspot.com.au/2013/03/make-it-sweet-tiny-yarn-butterflies.html

- a fork (in this case, with 4 prongs)
- some little balls of yarn
- a pair of scissors
Do you want to have some nice butterflies, too, in your home????
Well, follow me and the simple instructions....
We'll work with 2 different colours/yarns, so that you'll recognize the central body with a pair of antenna from the pair of wings!
Starting with the antenna/body yarn, cut a piece of 20cm and place it in the dent in the middle of your fork, like here...
 ...and keep it in place with the help of your thumb and forefinger!
Then, pick the yarn for the wings...

...and from left to right, insert the yarn, weaving it around each one of the prongs and keep going...

 ...remember to push down the yarn as you go! This is the end of your second round...
 ...the end of your third round....
 Notice that the odd rounds start from the left to the right, while the even ones go from the right to the left!!!
I've decided to reach 15 rounds and then stop weaving around...


This last picture is the real thing that you are creating, in fact you have to remember to push down your yarn as you go, after each round!! The picture above this one is there to show you better all the rounds, once completed!!
Now, you can cut the wings yarn...
 ...grab both the green ends and tie 2 tight knots (to do that, hold the handle of the fork between your knees!) , to fix the body and the wings of your butterfly...

Once this passage is done, you have to grab the bottom of your butterfly and gently slip it off from the fork...


When your butterfly is free, you'll have something like this...

Pick up the scissors and start to trim the antenna.. .
.
. 
...and then trim the wings...


 ....and your butterfly is free to fly...
 ....and eventually she joins her friends....
  ...but she is not the only one!!! As you can see, this craft is really addictive, so many more butterflies are on the way...
  Happy crafting, I will be dreaming butterflies.
6th October, 2013
Recycled CD Mosaic Flower Pot
(For the older child)

We all have those old useless CD’s still lying around. They may be the ones that ISP’s used to send out by the boatload, or maybe some old playlists from our pre-iPod days. It’s hard to toss them so why not use them for crafting? And seriously now, old Cd’s are craft supply perfection. They are free, and they are flashy.
You will need:
About 3 old CDs
Scissors or tin snips (I used an old pair of scissors)
Tacky glue (I used Fast Tack Tacky glue)
Plastic 6 inch terra cotta color flower pot
Black slick dimensional fabric paint
(It’s a good idea to wear eye protection while cutting the CD in case any of the pieces fly up)
1. Cut the CD up into pieces. Vary the sizes and the shapes. Working in small sections, squeeze some glue under the edge of the top lip. Start adding the CD pieces one at a time and place in the glue. Keep applying CD pieces in this way making sure you leave some space between each piece. Continue working all around until the pot is covered with the CD pieces. Let dry. You are adding the CD pieces in the center of the pot only. (See Photo) If you like you may add CD pieces onto the whole pot, if you do however, you will need more CDs.
For a full step by step picture description, please go to: http://www.makeiteasycrafts.com/2012/06/recycled-cd-mosaic-flower-pot.html
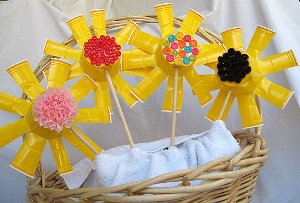
Eco Friendly Plastic Cup Flowers By: Amanda Formaro
Eco-friendly plastic cup flowers are great easy crafts for kids. They're so easy to make and the best thing is they also count as green recycling crafts since you can use old plastic cups and other materials already lying around the house!(For the younger child)
Materials:
- Plastic drinking cups
- Scissors
- Hot glue gun
- White craft glue
- 12" dowel or stick
- Items to decorate with (beads, buttons, pom poms, tissue paper, paint, etc)
Instructions:
- Use a pen (parents please!) or other fairly sharp object to poke a hole into the side of the cup, about one inch from the bottom.
- Cut slits halfway up the cup with your scissors. Bend slits outward.
- Lay cup on table with bottom of cup facing upward, this is the centre of your flower.
- Use anything you have on hand to decorate the centre. We used pom poms, buttons, tissue paper squares (wrapped around a pencil eraser) and pony beads. Use white craft glue to adhere them to the centre of the flower and set aside to dry.
- Warm up the hot glue gun.
- Insert dowel into the hole you made in the side of the cup earlier. Insert the dowel until the end of it hits the other side of the cup. Hot glue in place.
1st October, 2013
Paper Plate Flying Saucer
Paper Plate Flying Saucer

What you need:
- 2 paper plates
- 1 Styrofoam coffee cup
- Silver acrylic paint
- Craft jewels
- Instant grab glue, hot glue gun or glue dots
- Newspaper
- String (optional for hanging)
What you do:
- Paint the backside of both paper plates and the Styrofoam cup silver.
- Turn paper plates over. Twist newspaper and glue it inside one of the plates. This will give the plates some cushion and filler, keeping them from collapsing.
- Glue the plates together, silver sides facing out.
- Cut the Styrofoam cup in half, keeping the top half, discarding the excess. Glue small craft jewels around the cup and glue the cup to the top of the saucer. Glue a large craft jewel to the top of the cup.
- Glue craft jewels around the outside of the saucer, leaving about an inch of space between each one.
Go to http://craftsbyamanda.com/2013/01/paper-plate-flying-saucer.html for a more detailed description.
29th September, 2013
Grow A Grass Head Monster
This is a brilliant nature craft for kids, who will love creating their own grass head monster and watching him sprout hair!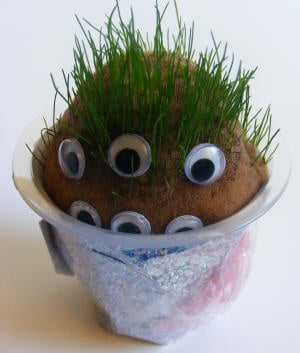 You will need:
Grass seed
Sawdust
Elastic band
Old yogurt pot
Googly eyes
Paper, buttons, ribbon etc to decorate
Instructions:
Grass seed
Sawdust
Elastic band
Old yogurt pot
Googly eyes
Paper, buttons, ribbon etc to decorate
Beaded Butterfly Beauty 18/09/2013
Materials: Recycled cardboard tube
Black pipe cleaner
Pony beads, various colors
Craft paint Scissors
Hot glue gun
Note: Adults should handle the hot glue gun. White craft glue can be used as an alternative, just keep in mind that it will require drying time.
Instructions:
1. Flatten the cardboard tube, and then cut it in half.
Each cardboard tube can make 4 butterflies.
2. Paint cardboard tube inside and out and allow to dry.
3. Bend pipe cleaner in half and thread on 6 pony beads. Trim the end of the pipe cleaner for antennae.

4. Cut cardboard tubes into 1/2" strips.
Bend strips about two-thirds the way down to create a small and large loop. Lay tubes next to each other and glue together.
Glue the beaded body to the top of the cardboard tube wings.
Go to http://www.allfreekidscrafts.com/Recycled-Kids-Crafts/Beaded-Butterfly-Beauty/ct/1 for more great ideas.
Cute as a Button Brooch:
Caterpillar Necklace:
http://www.allfreekidscrafts.com/Animal-Crafts-for-Kids/Catchall-Caterpillar-Necklace/ml/1
No comments:
Post a Comment